
Folders and the checklist list
When you have many checklists, it helps to sort them into folders — for example, "Kitchen", "Hall", "Monthly". Folders are created in the Work → Checklists list, and checklists are moved into them by dragging or several at a time.
What you need
- company administrator rights — the Checklists section isn't available to other employees.
How the list works
On the left is the folder panel:
- All checklists — all of the company's active checklists;
- No folder — checklists that haven't been put into a folder yet;
- Folders — your folders with the number of checklists in each;
- Deleted — checklists deleted in the last 90 days.
On the right are the checklists of the selected folder. Each row shows:
- the folder (in All checklists), the number of sections and questions; if there are no questions — a No questions mark;
- how many audits were run with the checklist in the last 30 days and their average score: green — 90% and above, yellow — from 70%, red — below 70%;
- when the last audit was, or Not conducted yet;
- icons for enabled options: access for selected employees only, Location, Signature, AI plan.
The switches above the list show All, In use (audited in the last 30 days), No audits (no audits in 30 days) and Restricted access. Next to them are sorting (By date modified, By title, By last audit, By number of audits) and the view: list or grid.
The search at the top of the page looks through all checklists at once by name, description, author and folder. Press the / key to jump to the search.
Create a folder
- Click the new folder icon. It's next to the Folders heading in the left panel. If there are no folders yet, click Create folder.
- Enter a name and pick a color. Folder names don't repeat within a company. The color helps tell folders apart in the list.
- Click "Create". The new folder opens right away.
To rename or delete a folder, hover over it in the left panel and click … → Rename or Delete folder. Deleting a folder doesn't delete its checklists — they move to No folder.
Move checklists into a folder
There are three ways:
- Drag a checklist onto a folder in the left panel (or onto No folder to take it out of a folder). If the checklist is selected, all selected checklists are moved.
- Click … in the checklist's row → Move to folder, choose a folder and click Move.
- Tick several checklists and click To folder on the panel that appears. The To new folder button creates a folder and puts the selected checklists into it right away.
To create a checklist straight into a folder, open that folder and click Create checklist — the folder will already be selected in the create window. You can also change a checklist's folder in the builder's side panel.
Actions with several checklists
Tick checklists or click Select all — a panel appears above the list:
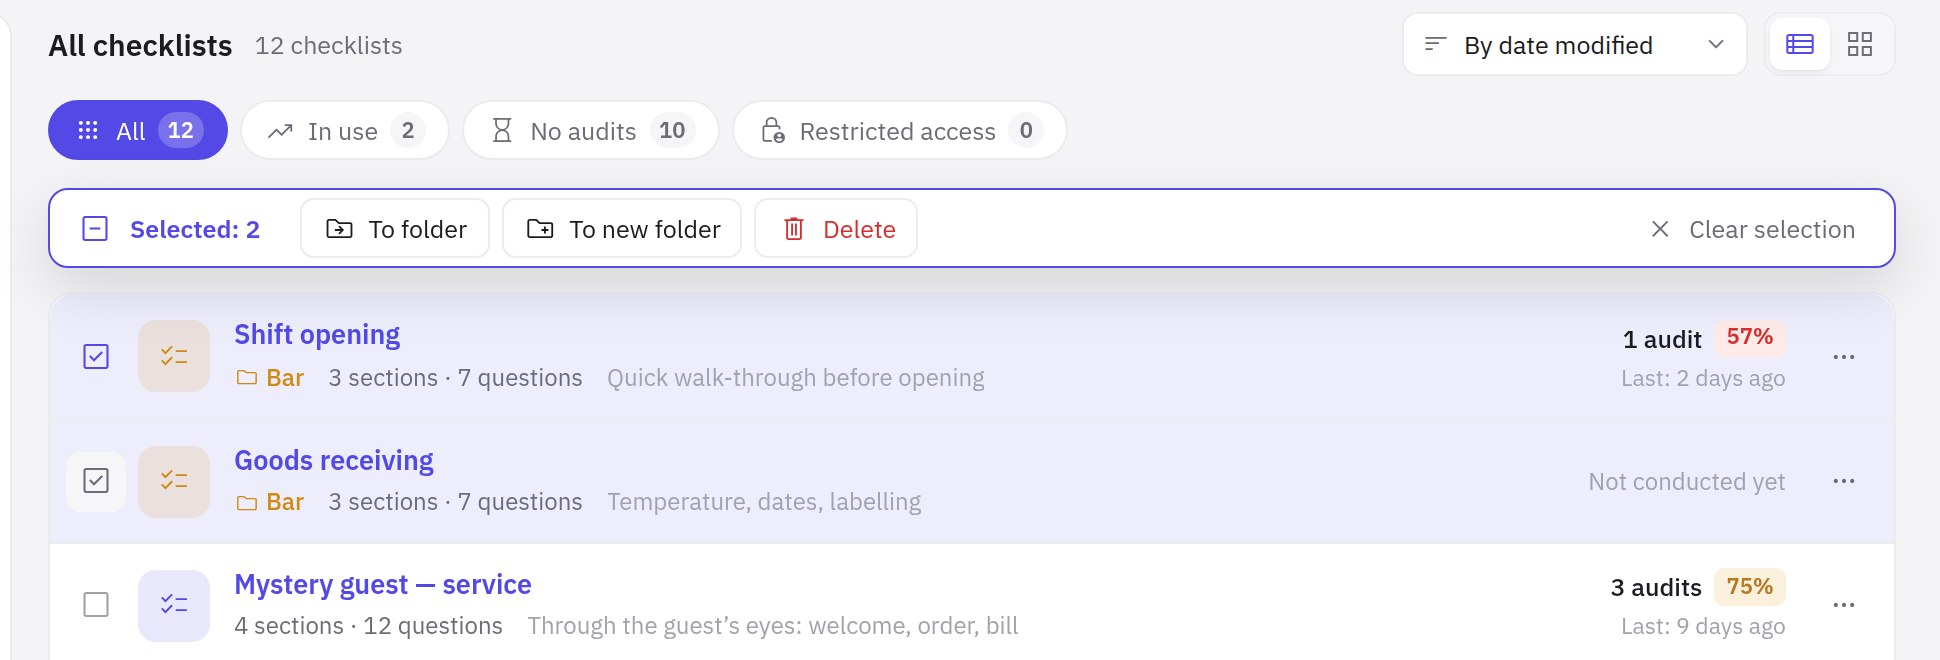
- To folder and To new folder — move the selected checklists;
- Delete — move the selected checklists to Deleted;
- Clear selection — the Esc key does the same.
In Deleted, this panel has a Restore button that brings back all selected checklists at once.
Folders in the mobile app
Folders are shared between the web dashboard and the app: auditors see folders that contain checklists in the app's checklist list. So name them in a way that makes it clear to auditors where to find the audit they need.
Frequently asked questions
Can a checklist be in several folders?
No, a checklist has one folder. To gather checklists by another attribute, use the search or the switches above the list.
Can I create a folder inside a folder?
No, folders have a single level.
What does "No audits" mean?
These are checklists with no audits in the last 30 days. It's worth reviewing them: some may no longer be needed.
How do I restore a deleted checklist?
Open Deleted in the left panel, click … in the checklist's row → Restore. Deleted checklists are kept here for 90 days.
Thank you! This helps us improve the help center.