
How to set up automation: 5 steps
For violation tasks to reach the right people, jeCheck needs to know who works at each location and who is responsible for what. Until setup is complete, a Setup: N of 5 checklist is shown at the top of Work → Automation. Items are ticked off automatically based on your company's actual data, and clicking an item takes you to where it's configured.
The key rule: role = position
A role in automation is the employee's position: “Chef”, “Bar manager”, “Maintenance”. In a checklist, a role is assigned to a section or question, and the scenario finds who holds that role at the location where the audit took place. For example, “Chef at Abay 10” is the employee at that location with the “Chef” position.
An employee has one role across all locations: if you change it at one location, it changes everywhere.
Step by step
- Create positions. In Management → Users, open the Positions tab and add the ones you need. You can also add a role on the Locations and teams tab in the Roles block — the field “New role, e.g. “Chef””.
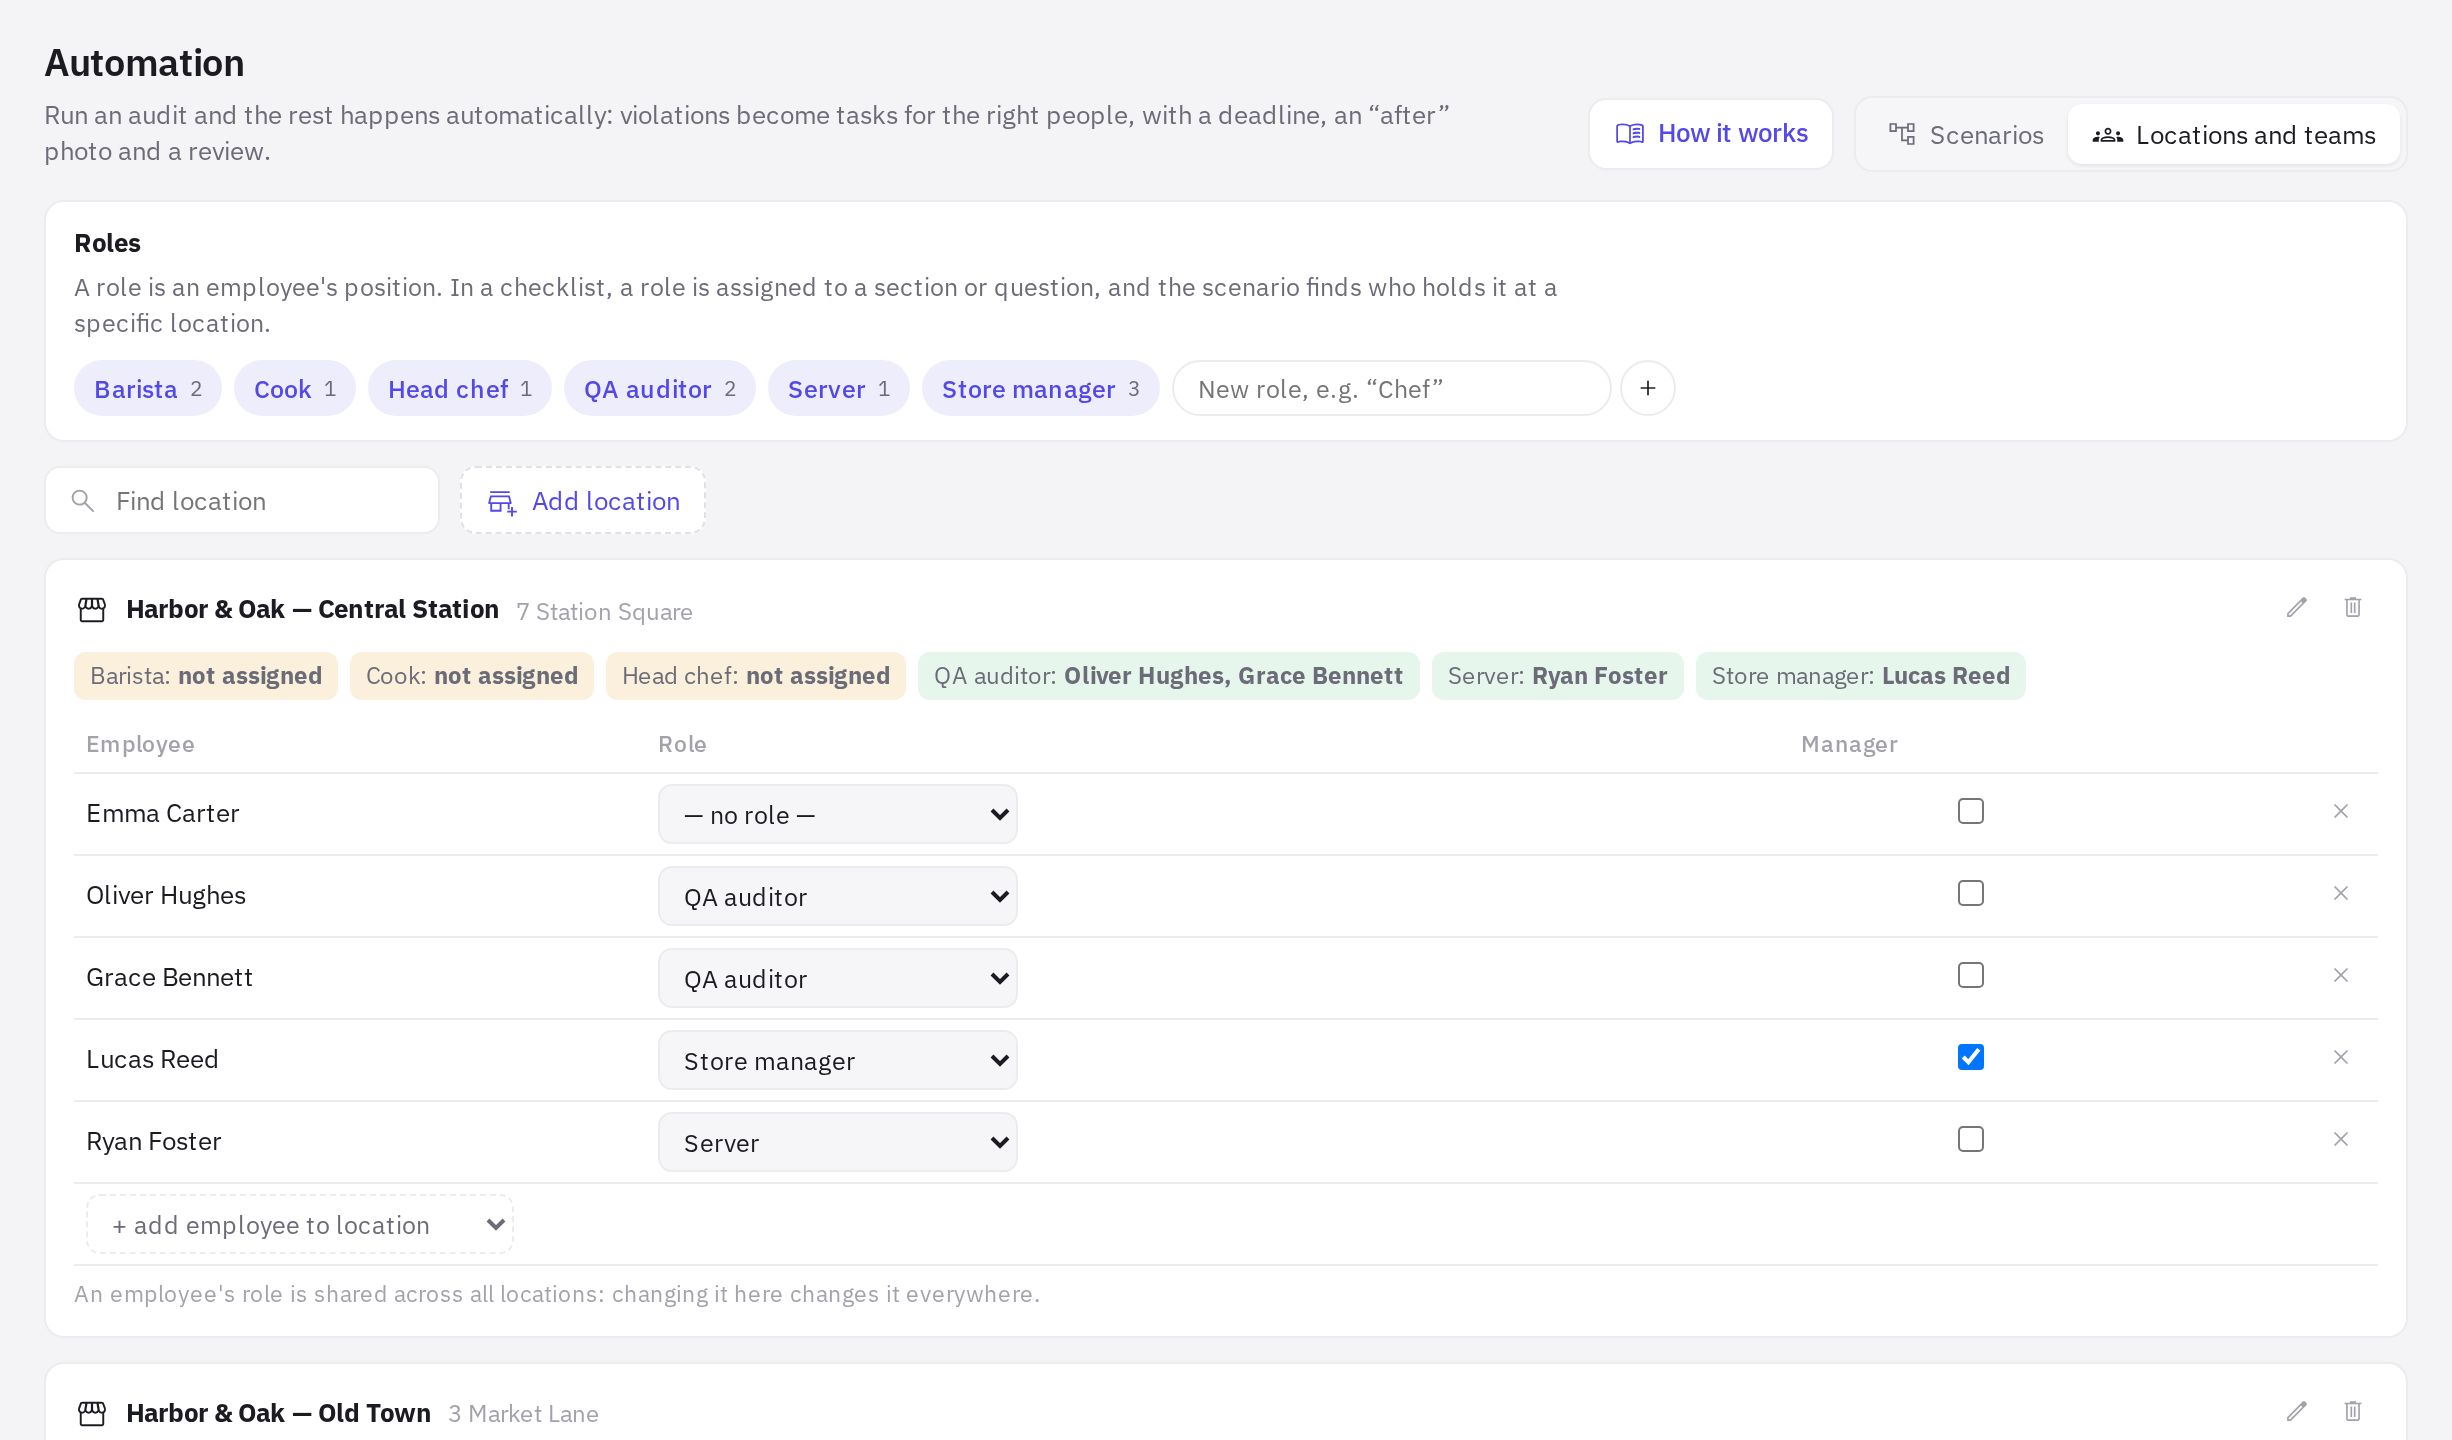
- Assign roles to location staff. On the Locations and teams tab, each location has an employee table. Add people with + add employee to location and pick a role for each in the Role column. This step counts as done when every location has at least one employee with a role.
- Mark location managers. In the same table, tick the Manager column. Managers get tasks that have no assignee, accept completed work and are notified about overdue tasks. This step counts as done when every location has a manager.
- Set roles in checklists. Open a checklist in the builder: in the side panel, the Section roles block sets a role for each section. You can give an individual question its own role in its settings, in the Who fixes the violation block. This step counts as done when at least one section has a role.
- Turn on a scenario. On the Scenarios tab, click New scenario, choose the Standard template, turn on Default for all checklists and click Save. Learn more in How to set up a scenario.
Start with step 5 — it takes a couple of minutes. The scenario starts working right away: until roles are set, tasks go to location managers. You can add roles gradually — tasks will be routed more precisely as you do.
The “Locations and teams” tab
Everything about people at locations is collected here:
- the Roles block — the list of positions and the number of employees in each;
- Add location — a new location with a name, address and email for reports;
- a card for each location — who holds each role (vacant roles are highlighted as “not assigned”), a table of employees with their role and a Manager checkbox, and a Remove from location button;
- the warning no manager — unassigned tasks will go to administrators on locations without a manager. The number of such locations is shown on the tab itself.
What if no one holds a role at a location
The task goes to the managers of that location, and if there are none — to the company administrators. The task gets the label “role not assigned at location”. That's a sign to go back to steps 2 and 3.
Frequently asked questions
A section has no role. Who gets the violation?
The location manager. In the section role list, this is the Manager option. For a question, the default is Same as section.
Can I hide the setup checklist?
Yes, with the cross button in the top right corner of the block. It reappears the next time you open the section, until all 5 steps are complete.
Do I have to complete all the steps?
No. Automation works as soon as step 5 is done: tasks go to location managers. The other steps make sure tasks go straight to the person responsible for each area.
Thank you! This helps us improve the help center.