
How to run your first mystery shopper visit
A visit is created in a four-step wizard: what you audit, who and when, the assignment, and the requirements. You end up with a link for each location — send it to the shopper by email or messenger, or show it as a QR code.
What you'll need
- company administrator rights;
- a checklist with questions — it becomes the shopper's form;
- the locations you want to audit;
- optionally, a mystery shopper in your shopper list (if you want to email the link).
Step by step
-
Open the wizard. In Work → Mystery shopper, click New visit (if there are no visits yet, Create the first visit).
-
“What we audit” step. Choose the Checklist for the form and tick the Locations (there's a search and a Select all button). A separate visit with its own link is created for each location. The Wave — optional field helps you group visits, for example “October 2026”. Next to each location you can see how many days ago a shopper was there.
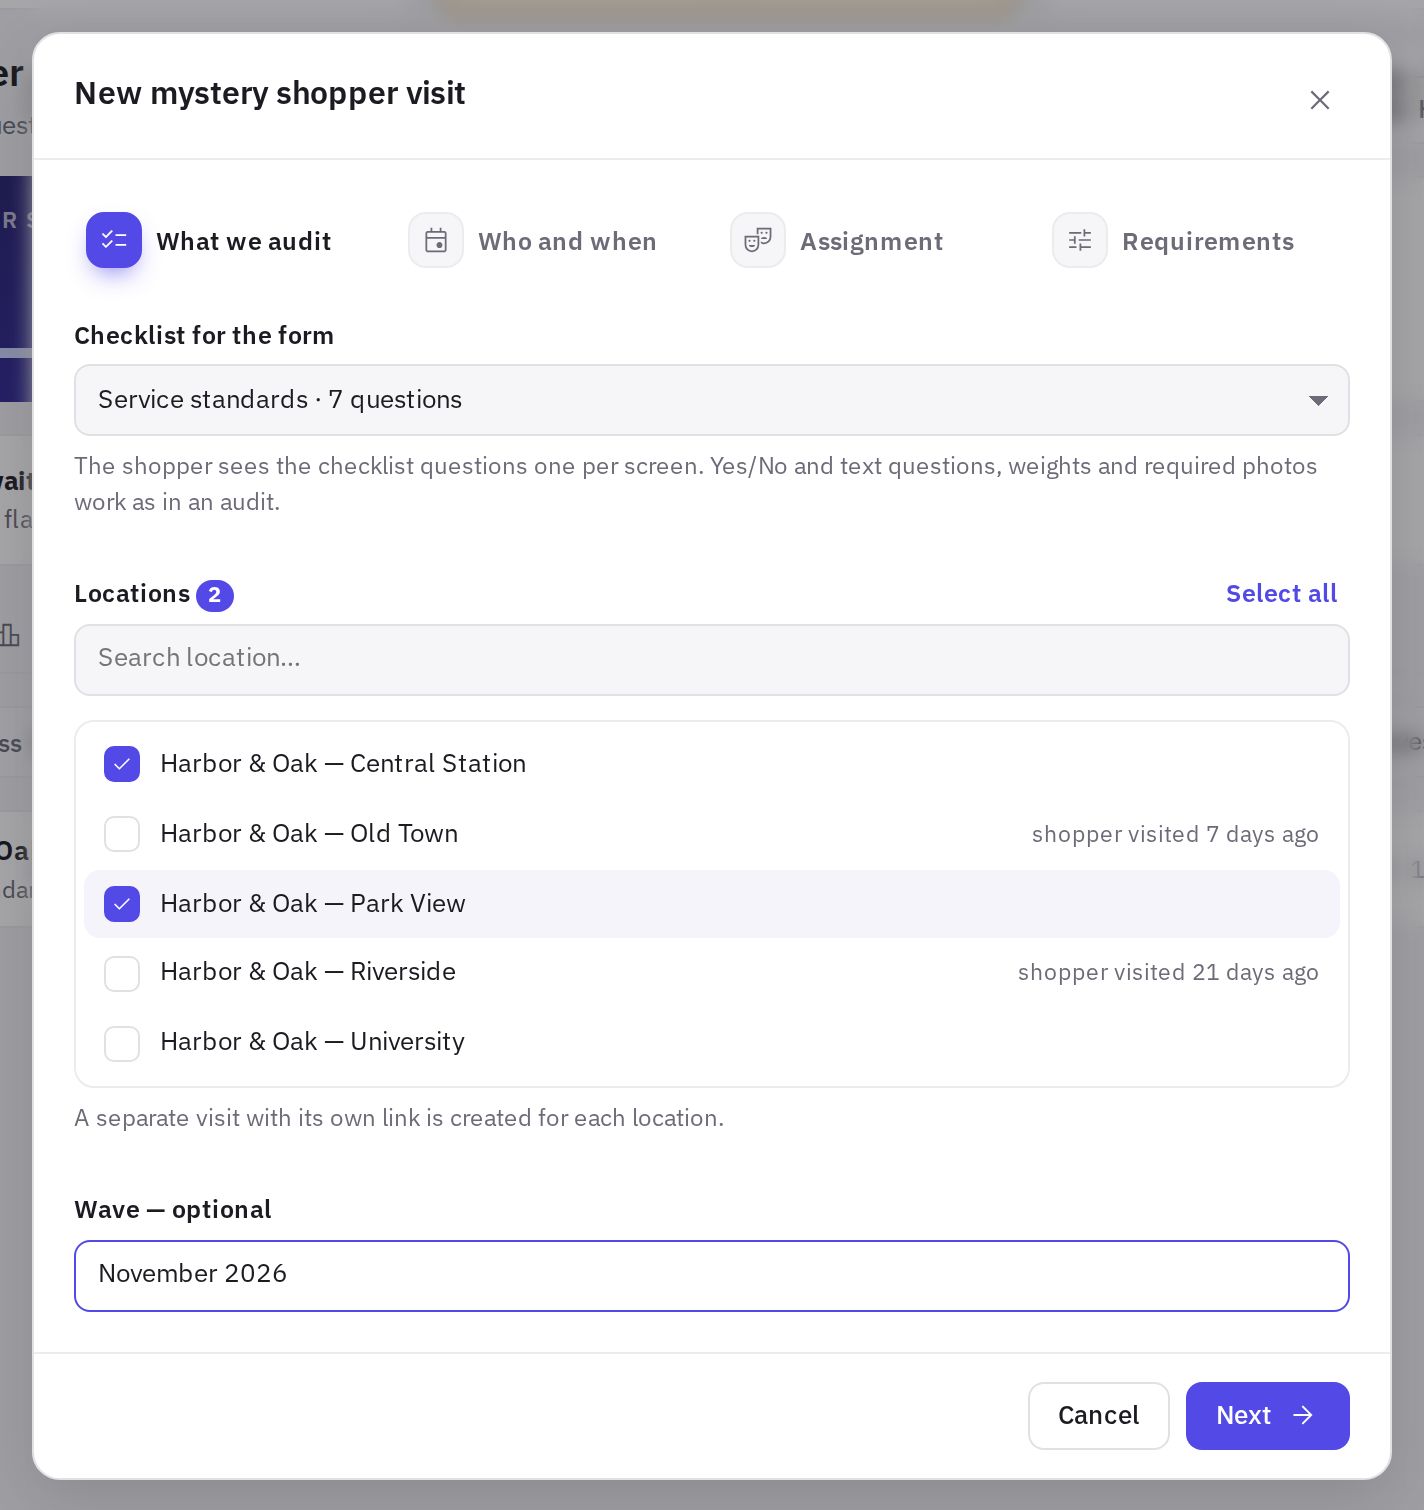
The "What we audit" step: questionnaire checklist, locations and wave -
“Who and when” step. Pick a shopper from the list or choose Anonymous link — the shopper then introduces themselves when they open it. Set the Visit window: from … to. If the shopper has an email address, turn on Email the link to the shopper.
-
“Assignment” step. Fill in the Cover story (who to pose as and how to behave) and Scenario and what to do. You can start from a template: Dine-in lunch, Takeaway order, In-store purchase, Complaint.
-
“Requirements” step. Turn on what you need and set the numbers (see the section below).
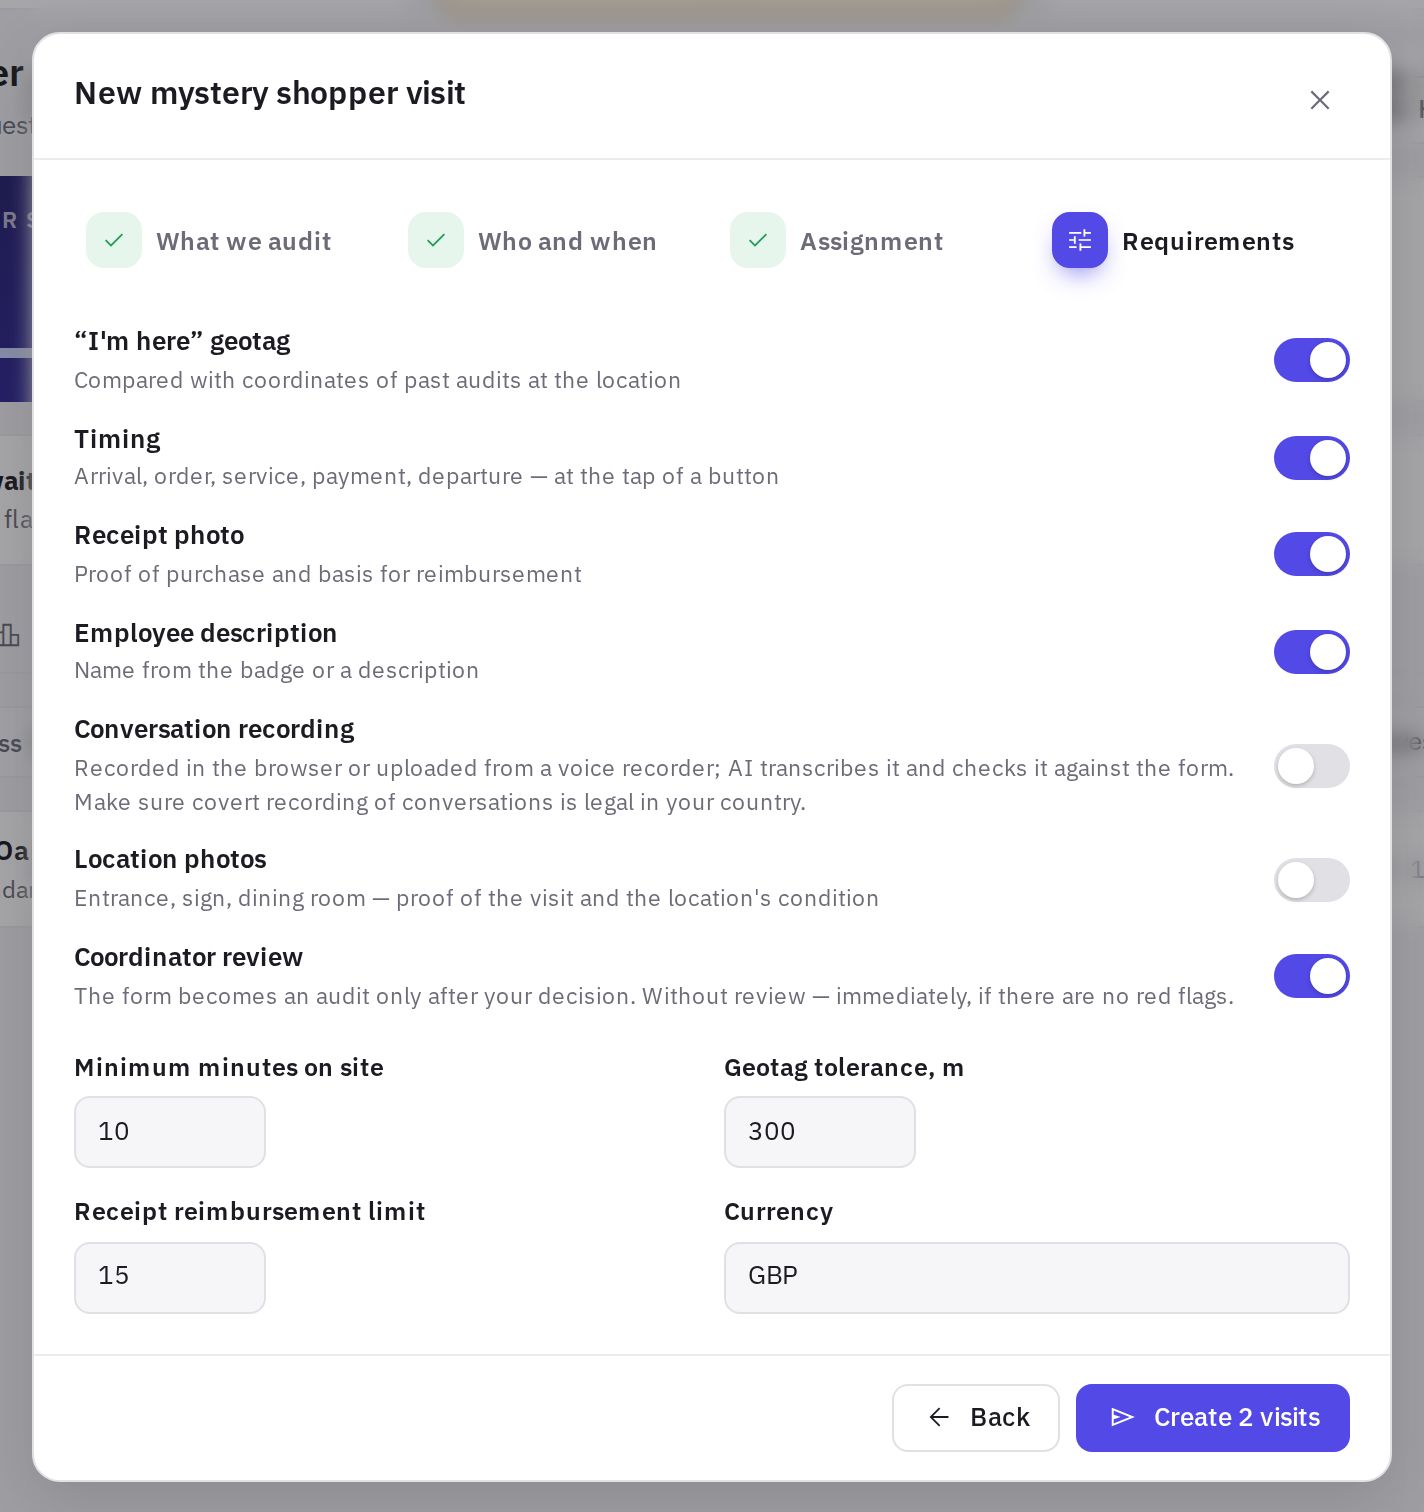
The "Requirements" step: visit switches and numeric fields -
Create the visits. Click Create N visits. In the Visits created window, copy a link, share it, click Copy all links or show the QR code. Open as shopper lets you see the form through the shopper's eyes.
The wizard remembers the settings of your last visit: checklist, cover story, scenario and requirements. That makes the next waves faster to set up.
Visit requirements
| Toggle | What it does |
|---|---|
| “I'm here” geotag | the coordinates are compared with previous audits of the location |
| Timing | arrival, order, service, payment, departure — recorded with buttons |
| Receipt photo | proof of purchase and the basis for reimbursement |
| Employee description | the name from the badge or a description |
| Conversation recording | recorded in the browser or uploaded from a voice recorder; AI transcribes it and checks it against the form |
| Location photos | entrance, signage, dining area |
| Coordinator review | the form becomes an audit only after your decision |
Number fields: Minimum minutes on site, Geotag tolerance, m, Receipt reimbursement limit (empty means no limit) and Currency.
Covert recording of conversations is not legal in every country. Before turning on audio recording, make sure it's lawful where the visit takes place.
If you turn off Coordinator review, a form with no red flags becomes an audit as soon as it's submitted. A form with a red flag still comes to you for review. The AI review (if your plan includes it) is prepared for auto-accepted forms too — it appears on the visit card.
Visit window
The shopper can't start the visit before the window opens, and the link closes once it ends. If the shopper has already started the form, they have another 24 hours after the window ends to finish it. If the form isn't submitted, the visit gets the “Expired” status. You can change the window, cover story and scenario later: click Edit on the visit card. An expired visit can be reopened with a new deadline using Reopen.
Mystery shoppers
It's convenient to keep your regular shoppers in a list: Shoppers tab → Add shopper. Enter the name, email, phone, city and a note (for example, payment details for reimbursement). The Active — can be assigned visits checkbox hides a shopper from the wizard without deleting their history. If the selected shopper has recently visited the same location, the wizard warns you and suggests sending someone else.
Frequently asked questions
Can I send one link for several locations?
No. Each location gets a separate visit with its own link. You can copy the links for all locations as a single list with the Copy all links button.
How do I send the link again?
Open the visit and click Link to copy it, or Send by email if the shopper is in your list and has an email address.
Why is the “New visit” button disabled?
Your company has no checklist with questions. Create one in the Checklists section.
Thank you! This helps us improve the help center.